
Comprehensive Guide to Towing Trailer Hitch Installation
Comprehensive Guide to Towing Trailer Hitch Installation
Are you struggling to install a towing trailer hitch on your pickup truck? At The Hitch Corner, we understand the challenges you face. This guide will walk you through selecting the right hitch, preparing for installation, and the step-by-step process of attaching a trailer hitch to your truck's bumper. We'll cover safety checks and troubleshooting tips to ensure your hitch is secure and ready for towing. By the end of this article, you'll have the knowledge to install your trailer hitch confidently or decide if professional installation is the best choice for your needs.
Key Takeaways
- Proper trailer hitch installation is crucial for safe towing and vehicle performance
- Regular maintenance and inspection of hitches are essential for longevity and safety
- Electrical connections require careful attention during installation and troubleshooting
- Misaligned hitches can lead to unsafe towing conditions and should be corrected immediately
- Professional help should be sought for persistent issues or complex installations
Understanding Towing Trailer Hitches
As an installer, I know that understanding towing trailer hitches is crucial for safe and efficient towing. In this section, I'll explain the purpose of a tow hitch corner, different hitch classes, vehicle and trailer compatibility, and legal requirements. These key aspects will help you choose the right hitch for your towing needs, ensuring proper weight distribution and wheel alignment for your vehicle.
The Purpose of a Trailer Hitch
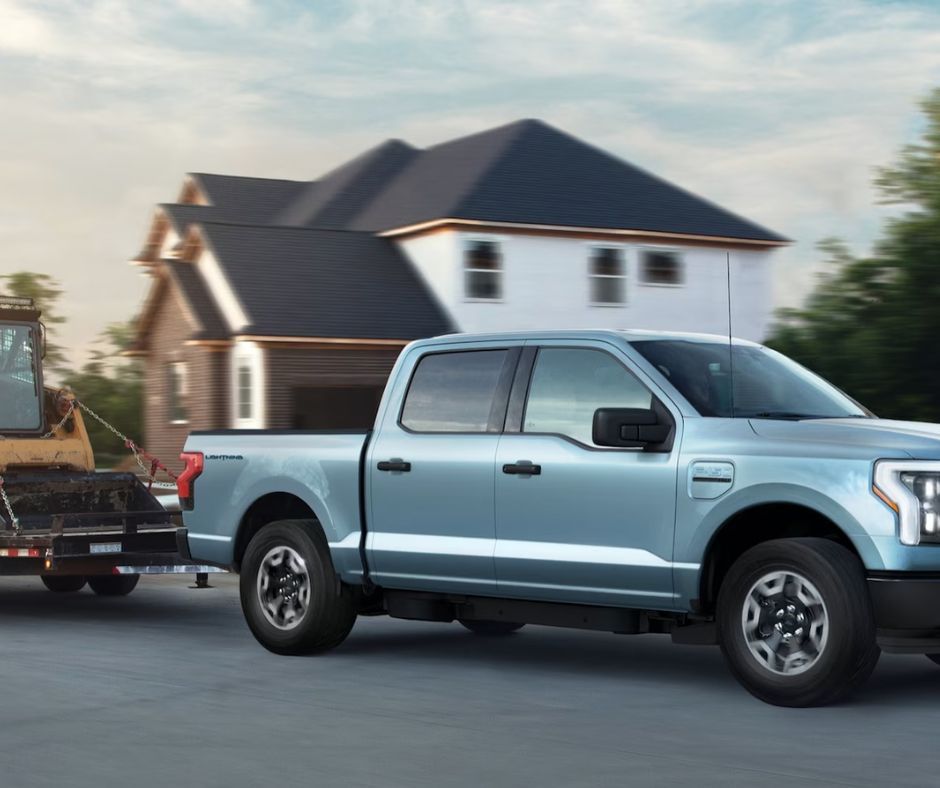
A trailer hitch serves as the essential connection point between your vehicle and the trailer you're towing. It's designed to securely attach various types of cargo carriers, including those for motorcycles, boats, and utility trailers. As an installer, I've seen how a properly fitted hitch can make all the difference in safely transporting heavy loads.
Trailer hitches come in different classes to accommodate various weight capacities. From light-duty Class I hitches for small cargo carriers to heavy-duty Class V hitches for large RVs, each type is engineered to handle specific towing needs. I always recommend choosing a hitch that matches or exceeds your intended towing weight to ensure safe operation.
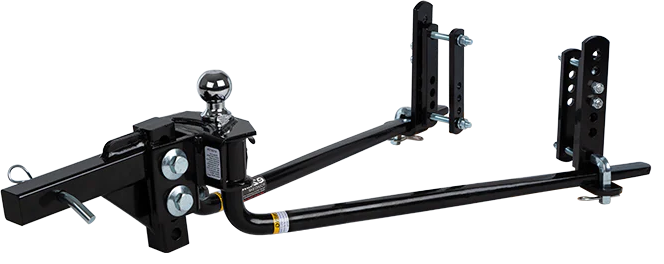
Beyond basic towing, some trailer hitches offer additional features like weight distribution systems and pintle hooks. Weight distribution hitches help maintain proper vehicle alignment when towing heavier loads, while pintle hitches are ideal for rugged, off-road towing applications. These specialized hitches demonstrate the versatility of modern towing equipment.
Different Classes of Trailer Hitches
As an installer, I've worked with various trailer hitch classes, each designed for specific towing capacities. Class I and II hitches are suitable for lightweight towing, often used with small utility trailers or bike racks. These hitches typically have a 1-1/4" receiver and can handle up to 3,500 pounds, making them ideal for many Chevrolet and Dodge passenger vehicles.
Class III and IV hitches are more robust, featuring a 2" receiver and capable of towing up to 10,000 pounds. I often install these on trucks and SUVs for hauling larger trailers or boats. These hitches usually require a larger ball size and can accommodate weight distribution systems, which help maintain proper tire contact and vehicle balance during towing.
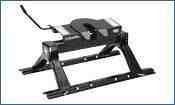
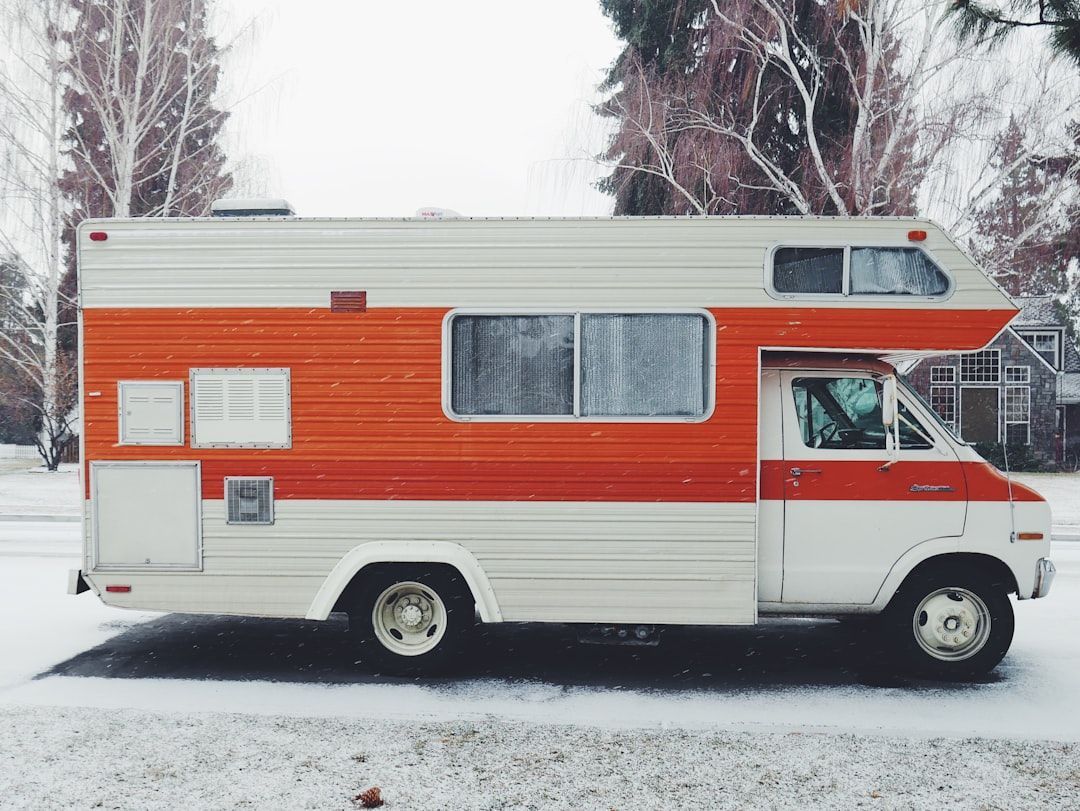
For heavy-duty towing, Class V hitches are the go-to choice. With a capacity of up to 20,000 pounds, they're perfect for large RVs or commercial trailers. When installing these hitches, I always ensure the vehicle's frame and brake system can handle the load. Some Class V hitches even feature integrated brake controllers, enhancing safety and control during towing operations.
Vehicle and Trailer Compatibility
When installing trailer hitches, I always check vehicle and trailer compatibility. This involves matching the hitch class to the vehicle's towing capacity and the trailer's gross weight. For example, a lightweight aluminum cart might only need a Class I hitch, while a heavy steel trailer requires a more robust Class IV or V hitch.
I also consider the vehicle's frame structure and attachment points. Some vehicles come pre-drilled for easy hitch installation, while others may need modifications. The sale price of a hitch can vary depending on these factors. Additionally, I ensure the hitch doesn't interfere with the vehicle's trunk access or other features like a rear-mounted winch.
Trailer compatibility extends beyond just weight ratings. I examine the trailer's tongue weight, which affects vehicle handling and safety. For optimal performance, I recommend keeping the tongue weight between 10-15% of the total trailer weight. This balance helps maintain proper weight distribution and prevents swaying during towing.
Legal Requirements and Regulations
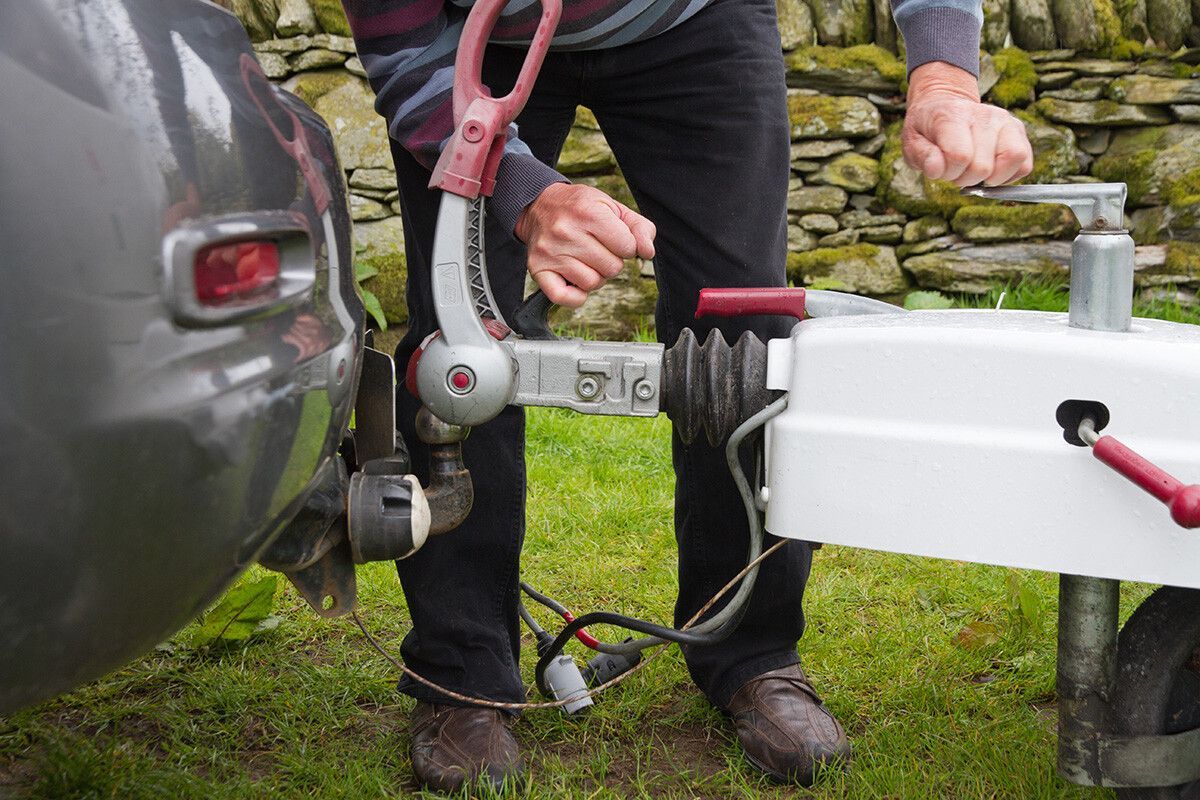
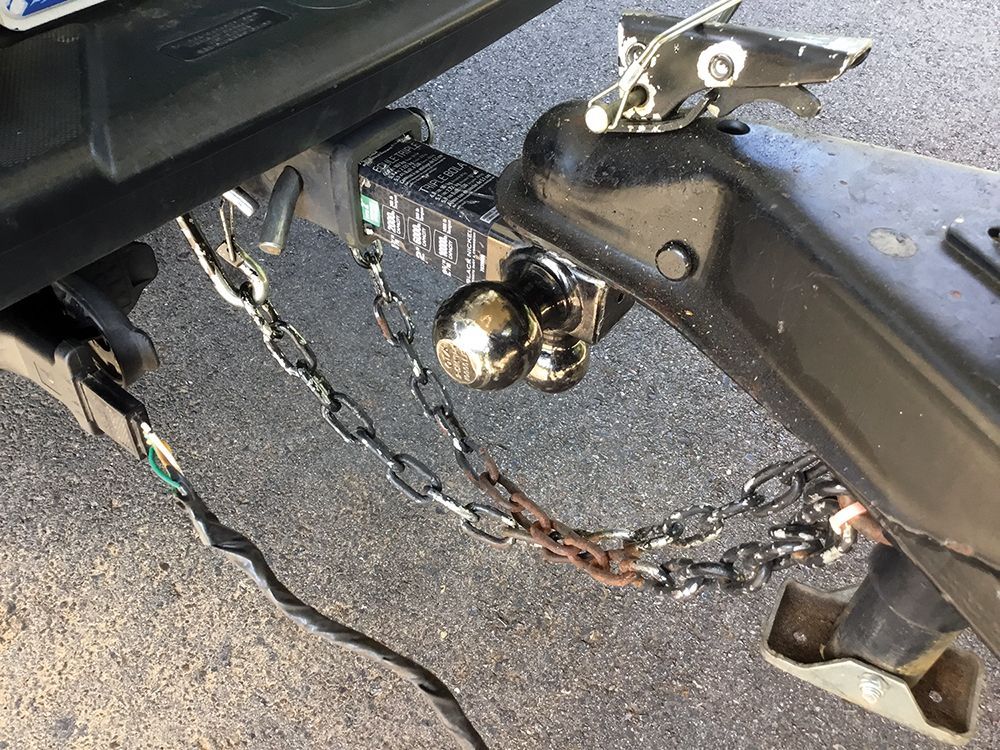
As an installer, I always emphasize the importance of understanding legal requirements for towing. Each state has specific regulations regarding trailer hitches, including weight limits and safety equipment. For example, many states require safety chains and a properly sized hitch pin to secure the tongue of the boat trailer to the vehicle.
I often remind customers about the legal implications of towing capacity. Exceeding your vehicle's rated towing capacity can void your warranty and lead to legal issues if an accident occurs. It's crucial to consider the combined weight of your boat, trailer, and cargo when selecting a hitch and planning your towing setup.
Another important legal consideration is the visibility of your license plate and taillights. I always ensure that the installed hitch doesn't obstruct these, as it's illegal in most states. If a customer's spare tire mount interferes with the hitch, we explore alternative solutions to maintain legal compliance while preserving functionality.
Selecting the Right Trailer Hitch for Your Needs
As an installer, I'll guide you through selecting the right trailer hitch for your needs. We'll assess your vehicle's towing capacity, match hitch classes to loads, compare fixed and detachable types, and find quality hitches. Whether you're in an SUV or truck, I'll help you choose the best tool for the job at the right price, ensuring compliance with United States regulations and meeting customer expectations.
Assessing Your Vehicle's Towing Capacity
As an installer, I always start by checking the vehicle's towing capacity, which varies greatly between models. For instance, a Chevrolet Silverado 1500 can typically tow between 7,000 to 13,300 pounds, depending on its configuration and transmission. I consult the factory manual to ensure I'm working with accurate figures for each specific vehicle.
When assessing towing capacity, I consider factors beyond just the engine power. The transmission type, axle ratio, and suspension setup all play crucial roles. For example, a Jeep Wrangler with the right package can tow up to 3,500 pounds, but this capacity drops significantly with different configurations. I always verify these details before recommending a hitch.
I also check our inventory to match the right hitch to the vehicle's capacity. It's important to note that adding aftermarket parts or modifying the vehicle can affect its towing capacity. In such cases, I advise customers to reassess their vehicle's capabilities to ensure safe towing practices.
Matching Hitch Classes to Towing Loads
As an installer, I match hitch classes to towing loads based on the vehicle's capacity and the intended use. For lighter loads like small utility trailers or bike racks, I often recommend Class I or II hitches, which are suitable for most passenger vehicles in the contiguous United States. These hitches typically have a 1-1/4" receiver and can handle up to 3,500 pounds.
For heavier loads, I suggest Class III or IV hitches, which feature a 2" receiver and can tow up to 10,000 pounds. These are ideal for larger trailers, boats, or RVs. In some cases, I might recommend a drop hitch to adjust the height and ensure proper trailer alignment. Popular options like the Reese hitch offer excellent versatility for various towing needs.
When dealing with the heaviest loads, I turn to Class V hitches or specialized options like the B&W gooseneck hitch. These can handle up to 20,000 pounds and often require a 2 5/16 ball hitch for secure attachment. I always ensure the hitch class matches or exceeds the vehicle's maximum towing capacity to guarantee safe and efficient towing.
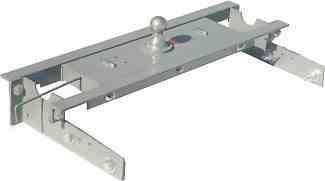
Fixed vs. Detachable Hitch Types
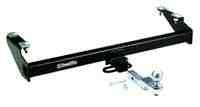
As an installer, I often recommend fixed hitches for customers who tow frequently. These hitches, like the Draw-Tite hitch, offer robust performance and are permanently attached to the vehicle's frame. They're ideal for heavy-duty towing and can easily accommodate weight distribution hitches with sway control, enhancing stability for larger trailers.
For those who prefer a cleaner look when not towing, I suggest detachable hitches such as the Stealth Hitch. These allow for easy removal of the receiver, maintaining the vehicle's aesthetics. While slightly more expensive, they offer flexibility and are particularly popular among SUV owners who only tow occasionally.
When installing hitches, I consider factors like ground clearance and compatibility with other accessories. For instance, the B&W hitch is excellent for gooseneck towing, while an anti-sway hitch is crucial for long trailers prone to wind effects. I always ensure the chosen hitch type aligns with the customer's specific towing needs and vehicle specifications:
| Hitch Type | Best For | Key Features |
|---|---|---|
| Fixed Hitch | Frequent Towers | Permanent, Sturdy, Supports Heavy Loads |
| Detachable Hitch | Occasional Towers | Removable, Aesthetically Pleasing, Versatile |
| Weight Distribution Hitch | Large Trailers | Improves Stability, Reduces Sway |
Finding Quality Trailer Hitches
As an installer, I prioritize quality when selecting trailer hitches. I often recommend brands like Draw-Tite and CURT for their reliability and wide range of options, including drop hitch receivers and weight distribution hitches. These manufacturers offer products that meet or exceed industry standards, ensuring customer safety and satisfaction.
When installing gooseneck hitches or pintle hitches, I always consider the vehicle's specific requirements. For instance, a B&W gooseneck hitch provides excellent stability for heavy loads, while a pintle hitch offers versatility for various trailer types. I ensure each installation is tailored to the customer's towing needs and vehicle specifications.
For customers concerned about tongue weight, I often suggest a Weigh Safe hitch. This innovative product allows real-time monitoring of tongue weight, helping prevent overloading and improving towing safety. By recommending such advanced solutions, I help customers make informed decisions about their towing equipment.
Preparing for Installation
As an installer, I'll guide you through preparing for trailer hitch installation. We'll cover essential tools, safety measures, manufacturer's instructions, and workspace setup. Whether you're installing a receiver hitch, CURT hitch, or adjustable hitch on your truck, proper preparation ensures a smooth process. Let's dive into the key steps to get your workspace ready for a successful installation.
Tools and Materials Needed
As an installer, I always ensure I have the right tools for trailer hitch installation. My essential kit includes a torque wrench, socket set, and drill with metal bits. For larger installations, I might also need a hydraulic jack and jack stands to safely lift and support the vehicle.
I keep a variety of hardware on hand, including hitch pins, clips, and ball mounts. These components are crucial for securing the hitch and ensuring proper trailer attachment. I also stock different sizes of trailer balls to accommodate various trailer types, from small utility trailers to large RVs.
Safety equipment is non-negotiable in my workspace. I always wear safety glasses, work gloves, and sturdy shoes. For installations requiring welding, I use a welding helmet and fire-resistant clothing. Having a fire extinguisher nearby is also a must for any potential emergencies.
Safety Measures Before Starting
Before I start any trailer hitch installation, I always ensure the vehicle is on a level surface and properly secured. I engage the parking brake and chock the wheels to prevent any unexpected movement. This step is crucial for my safety and the accuracy of the installation.
I carefully inspect the undercarriage of the vehicle for any existing damage or rust. If I find significant corrosion, I address it before proceeding with the installation. This precaution helps maintain the vehicle's structural integrity and ensures a secure hitch attachment.
I also review the vehicle's electrical system, particularly the wiring near the installation area. If I'm installing a hitch with integrated wiring, I disconnect the battery to prevent any electrical shorts. This practice safeguards both the vehicle's electrical components and my personal safety during the installation process.
Reviewing the Manufacturer's Instructions
As an installer, I always review the manufacturer's instructions before starting a trailer hitch installation. These guidelines provide crucial information about the specific hitch model, including weight ratings, required tools, and any vehicle-specific considerations. I pay close attention to torque specifications for bolts and nuts, as proper tightening is essential for safe towing.
I often encounter unique installation requirements for different vehicle makes and models. For example, some trucks require lowering the spare tire or temporarily removing the exhaust system to access mounting points. By carefully studying the instructions, I can anticipate these challenges and prepare accordingly, ensuring a smooth installation process.
The manufacturer's instructions also provide valuable information about wiring harness installation and brake controller compatibility. I use this guidance to properly integrate the hitch with the vehicle's electrical system, ensuring all trailer lights and brakes function correctly. Following these instructions helps me deliver a professional installation that meets safety standards and customer expectations:
| Instruction Component | Importance | Action Required |
|---|---|---|
| Weight Ratings | Critical for Safety | Match to Vehicle Capacity |
| Torque Specifications | Ensures Secure Fitting | Use Torque Wrench |
| Wiring Guidelines | Proper Electrical Integration | Follow Diagram Carefully |
Setting Up Your Workspace
As an installer, I always set up my workspace before starting a trailer hitch installation. I ensure I have enough room to move around the vehicle comfortably, typically allowing at least 3 feet of clearance on all sides. I also make sure the area is well-lit, using additional work lights if necessary to see clearly under the vehicle.
I organize my tools and materials on a nearby workbench or portable tool cart for easy access during the installation. This includes arranging my socket set, torque wrench, and drill in a logical order. I also keep a copy of the manufacturer's instructions within reach for quick reference throughout the process.
Safety is paramount in my workspace. I keep a first aid kit and fire extinguisher nearby and ensure my work area is free from trip hazards. I also use a non-slip mat under the vehicle to provide secure footing while I work. These precautions help me maintain a safe and efficient working environment throughout the hitch installation.
Step-by-Step Guide to Installing a Towing Trailer Hitch
As an installer, I'll guide you through the step-by-step process of installing a towing trailer hitch. We'll cover clearing the installation area, aligning the hitch with the vehicle frame, securing it with bolts and hardware, tightening fasteners to specifications, and connecting electrical components. This comprehensive guide ensures a safe and proper hitch installation for your towing needs.
Clearing the Installation Area
I always start by thoroughly cleaning the installation area. Using a wire brush, I remove any rust, dirt, or debris from the vehicle's frame where the hitch will attach. This ensures a secure fit and prevents corrosion that could compromise the hitch's integrity over time.
Next, I carefully lower the exhaust system if it interferes with the installation area. I use exhaust hangers or support straps to hold it out of the way without causing damage. This step is crucial for accessing all mounting points and ensuring proper clearance for the hitch.
Finally, I remove any plastic underbody panels or heat shields that might obstruct the installation. I keep track of all removed hardware and make note of their positions to ensure everything is properly reinstalled after the hitch is in place. This attention to detail helps maintain the vehicle's original design and functionality.
Aligning the Hitch With the Vehicle Frame
I carefully position the hitch under the vehicle, aligning it with the pre-drilled holes in the frame. For vehicles without pre-drilled holes, I use the hitch as a template to mark the drilling points. This ensures precise alignment and a secure fit.
Using a jack or a helper, I lift the hitch into place, making sure it's level and centered. I pay close attention to clearances around the spare tire, exhaust system, and any sensors or wiring harnesses. Proper alignment at this stage prevents issues with fitment and functionality later.
Before securing the hitch, I double-check its position relative to the vehicle's rear bumper and tow hook (if present). I ensure the receiver tube extends far enough beyond the bumper for easy access but doesn't protrude excessively. This balance optimizes both functionality and aesthetics.
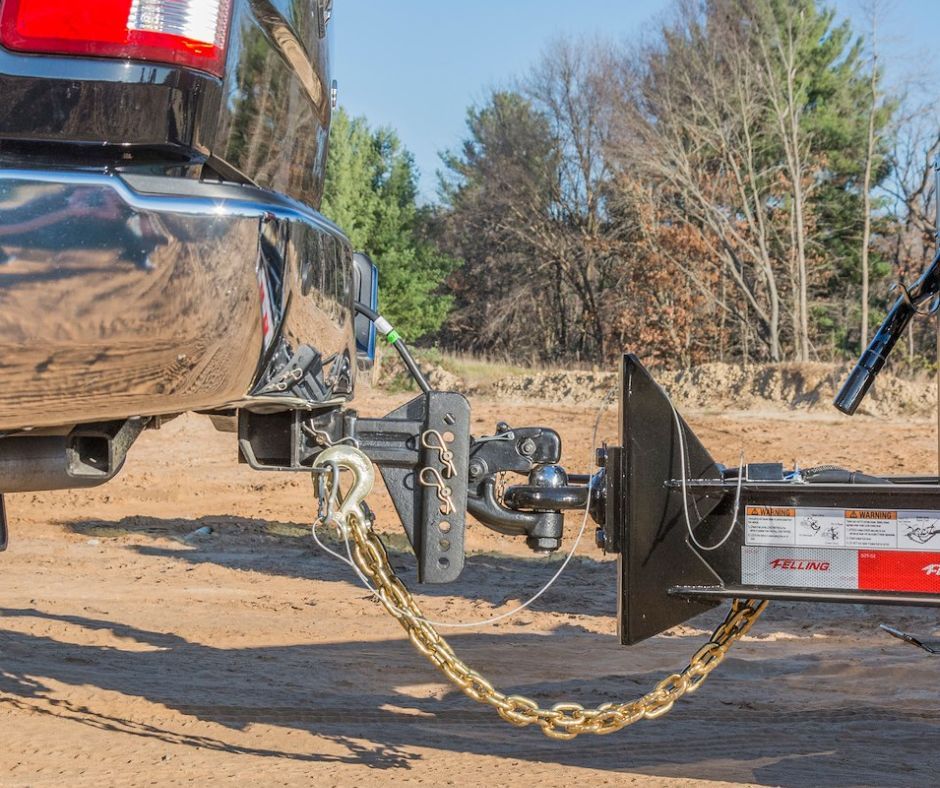
Securing the Hitch With Bolts and Hardware
I begin securing the hitch by inserting the provided bolts through the mounting holes. I always use the specific hardware included with the hitch kit, as these are designed to meet the necessary strength requirements. For some installations, I may need to enlarge existing holes or drill new ones, ensuring I follow the manufacturer's specifications precisely.
Next, I add any required spacers or washers before threading on the nuts. These components help distribute the load evenly and prevent metal-on-metal contact that could lead to premature wear. I'm careful not to fully tighten the bolts yet, leaving them loose enough to allow for final adjustments.
Finally, I check the alignment once more before beginning the tightening process. I use a torque wrench to ensure each bolt is tightened to the exact specification provided by the manufacturer. This step is crucial for the hitch's safety and longevity, as improper torque can lead to loosening or even failure during towing.
Tightening Fasteners to Specifications
I always use a torque wrench to tighten fasteners to the manufacturer's specifications. This tool ensures I apply the correct amount of force, preventing over-tightening that could damage the vehicle's frame or under-tightening that could lead to a loose hitch. I refer to the installation guide for the exact torque values, which typically range from 50 to 110 ft-lbs for most trailer hitches.
When tightening, I follow a specific pattern to ensure even pressure distribution. I start with the center bolts and work my way outward, tightening each bolt to about 50% of the final torque value. Then, I repeat the process, bringing each bolt to its full specified torque. This method helps prevent warping and ensures a secure fit.
After tightening, I double-check all fasteners with my torque wrench. I also visually inspect the hitch's alignment and clearance. If I notice any issues, such as uneven gaps or contact with the vehicle's body, I loosen the bolts and readjust before re-tightening. This final check is crucial for ensuring the hitch is properly installed and ready for safe towing.
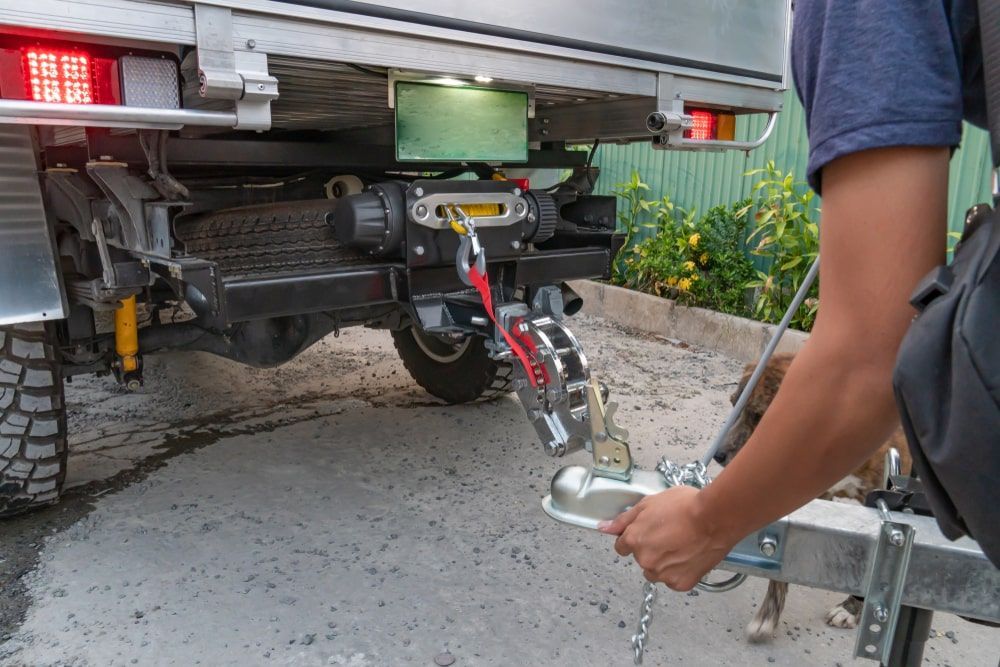
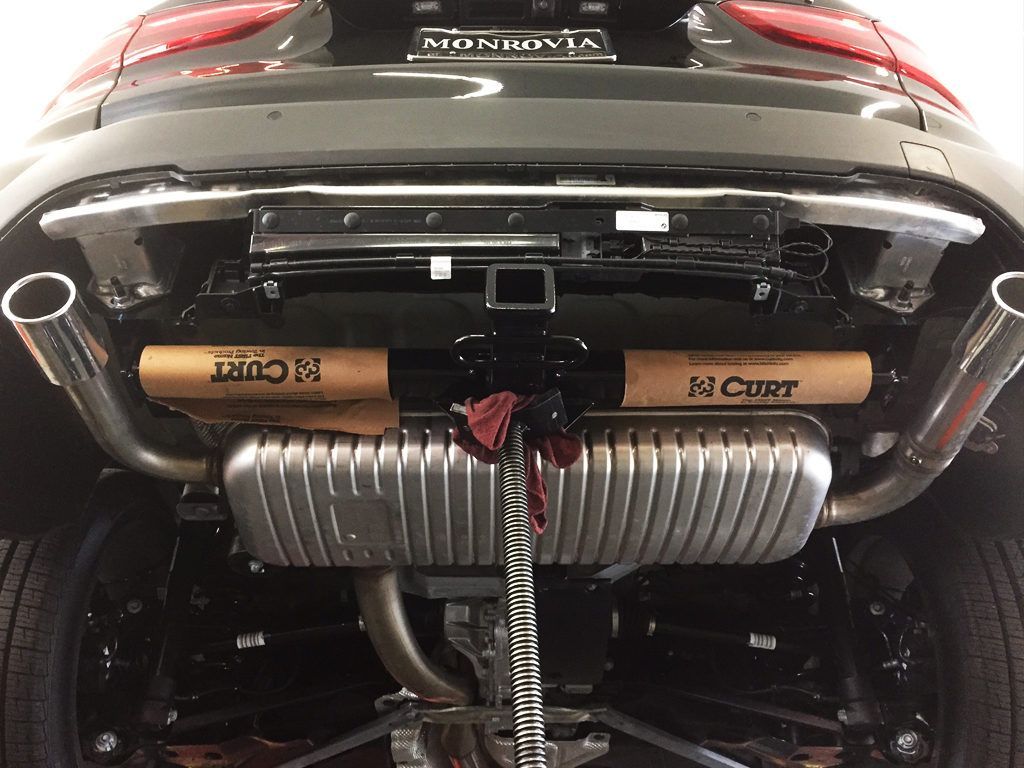
Connecting Electrical Components
After securing the hitch, I focus on connecting the electrical components. I start by locating the vehicle's wiring harness, typically found near the rear taillights or in the trunk area. I carefully remove any panels or trim pieces to access the wiring, ensuring I don't damage any existing components.
Next, I install the trailer wiring harness, which usually consists of a 4-way or 7-way connector. I connect each wire according to the color-coded diagram provided in the installation kit. For more complex setups, I might need to use a circuit tester to identify the correct wires for turn signals, brake lights, and running lights.
Finally, I test all electrical connections to ensure proper functionality. I use a trailer light tester or enlist a helper to verify that all lights work correctly when activated. This includes checking turn signals, brake lights, and running lights. Once I confirm everything is working, I secure all wiring with zip ties or clips to prevent any loose wires from getting caught or damaged during travel:
| Wire Color | Function | Connection Point |
|---|---|---|
| Brown | Running Lights | Taillight Circuit |
| Yellow | Left Turn/Brake | Left Turn Signal |
| Green | Right Turn/Brake | Right Turn Signal |
| White | Ground | Vehicle Frame |
Post-Installation Safety Checks
As an installer, I'll guide you through essential post-installation safety checks for your towing trailer hitch. We'll cover inspecting the hitch for proper installation, performing a test tow, ongoing maintenance tips, and recognizing signs of wear. These crucial steps ensure your hitch remains safe and reliable for all your towing needs.
Inspecting the Hitch for Proper Installation
After installing a trailer hitch, I always perform a thorough visual inspection. I check that all bolts are properly tightened and that there are no gaps between the hitch and the vehicle frame. I also ensure that the hitch is level and centered, as any misalignment could affect towing performance and safety.
Next, I verify the clearance around the hitch. I make sure it doesn't interfere with the exhaust system, spare tire, or any sensors. I also check that the receiver tube is easily accessible and that the safety chain attachments are in place and functional. This attention to detail helps prevent issues during actual towing.
Finally, I test the electrical connections. I connect a trailer light tester to the newly installed wiring harness and verify that all lights function correctly. This includes testing turn signals, brake lights, and running lights. I also check for any loose wires or exposed connections that could cause problems down the road. A comprehensive inspection ensures the hitch is ready for safe use:
- Visual check for proper alignment and bolt tightness
- Clearance verification around exhaust, spare tire, and sensors
- Electrical connection testing with a trailer light tester
- Inspection of safety chain attachments
- Final check for loose wires or exposed connections
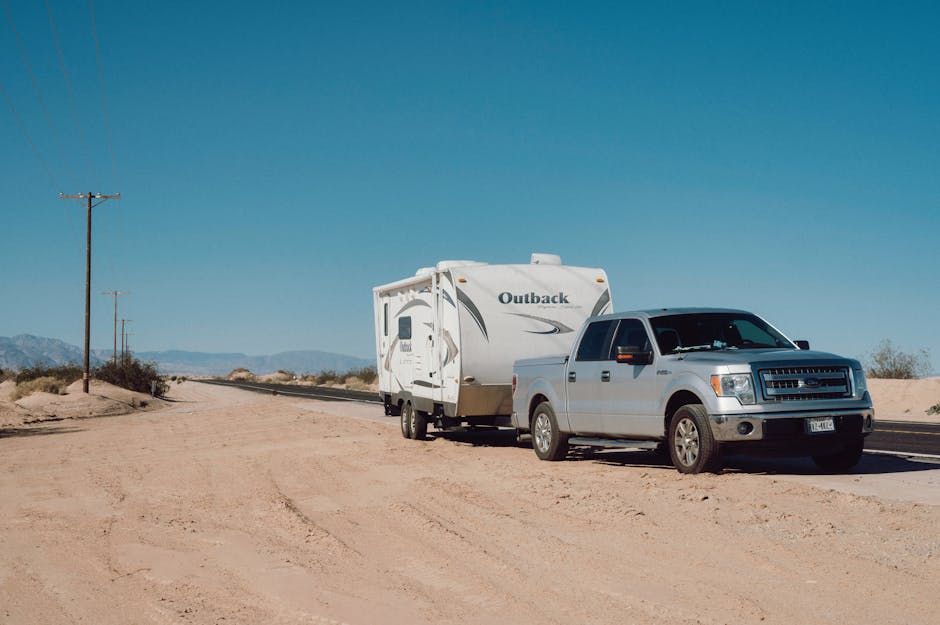
Performing a Test Tow
After installing a trailer hitch, I always perform a test tow to ensure everything functions correctly. I start by attaching a trailer or load that's similar in weight to what the customer plans to tow regularly. This initial test helps me gauge how the vehicle handles the added weight and if any adjustments are needed.
During the test tow, I pay close attention to the vehicle's handling, braking, and acceleration. I look for any signs of instability, such as swaying or difficulty maintaining lane position. I also listen for unusual noises that might indicate a loose connection or improper installation. This hands-on approach allows me to identify and address any issues before the customer hits the road.
After the road test, I perform a final inspection of the hitch and electrical connections. I check for any signs of stress or movement in the hitch components and ensure all lights are still functioning correctly. If I notice any issues, I make the necessary adjustments or repairs immediately. This comprehensive testing process ensures the hitch is safe and ready for regular use:
| Test Phase | Key Checks | Action if Issue Found |
|---|---|---|
| Initial Load | Weight distribution, vehicle stance | Adjust hitch height or weight distribution system |
| Road Test | Handling, braking, stability | Check suspension, brake controller settings |
| Post-Drive Inspection | Hitch integrity, electrical function | Tighten connections, repair wiring |
Ongoing Maintenance Tips
I always emphasize the importance of regular hitch maintenance to my customers. Every few months, I recommend inspecting the hitch for signs of rust or corrosion, especially after exposure to road salt or harsh weather. I advise applying a rust-inhibiting spray to protect the metal and ensure longevity.
Proper lubrication is crucial for smooth operation. I suggest applying grease to the ball mount and hitch ball at least once a season or before any long trips. This prevents wear and reduces noise during towing. For customers with removable hitches, I stress the importance of keeping the receiver tube clean and lubricated to prevent seizing.
Electrical maintenance is often overlooked but equally important. I teach customers how to check their wiring connections for loose or corroded terminals. I recommend using dielectric grease on all electrical connections to prevent moisture ingress and maintain reliable trailer lighting. Regular checks of the brake controller settings are also essential for safe towing.
Recognizing Signs of Wear
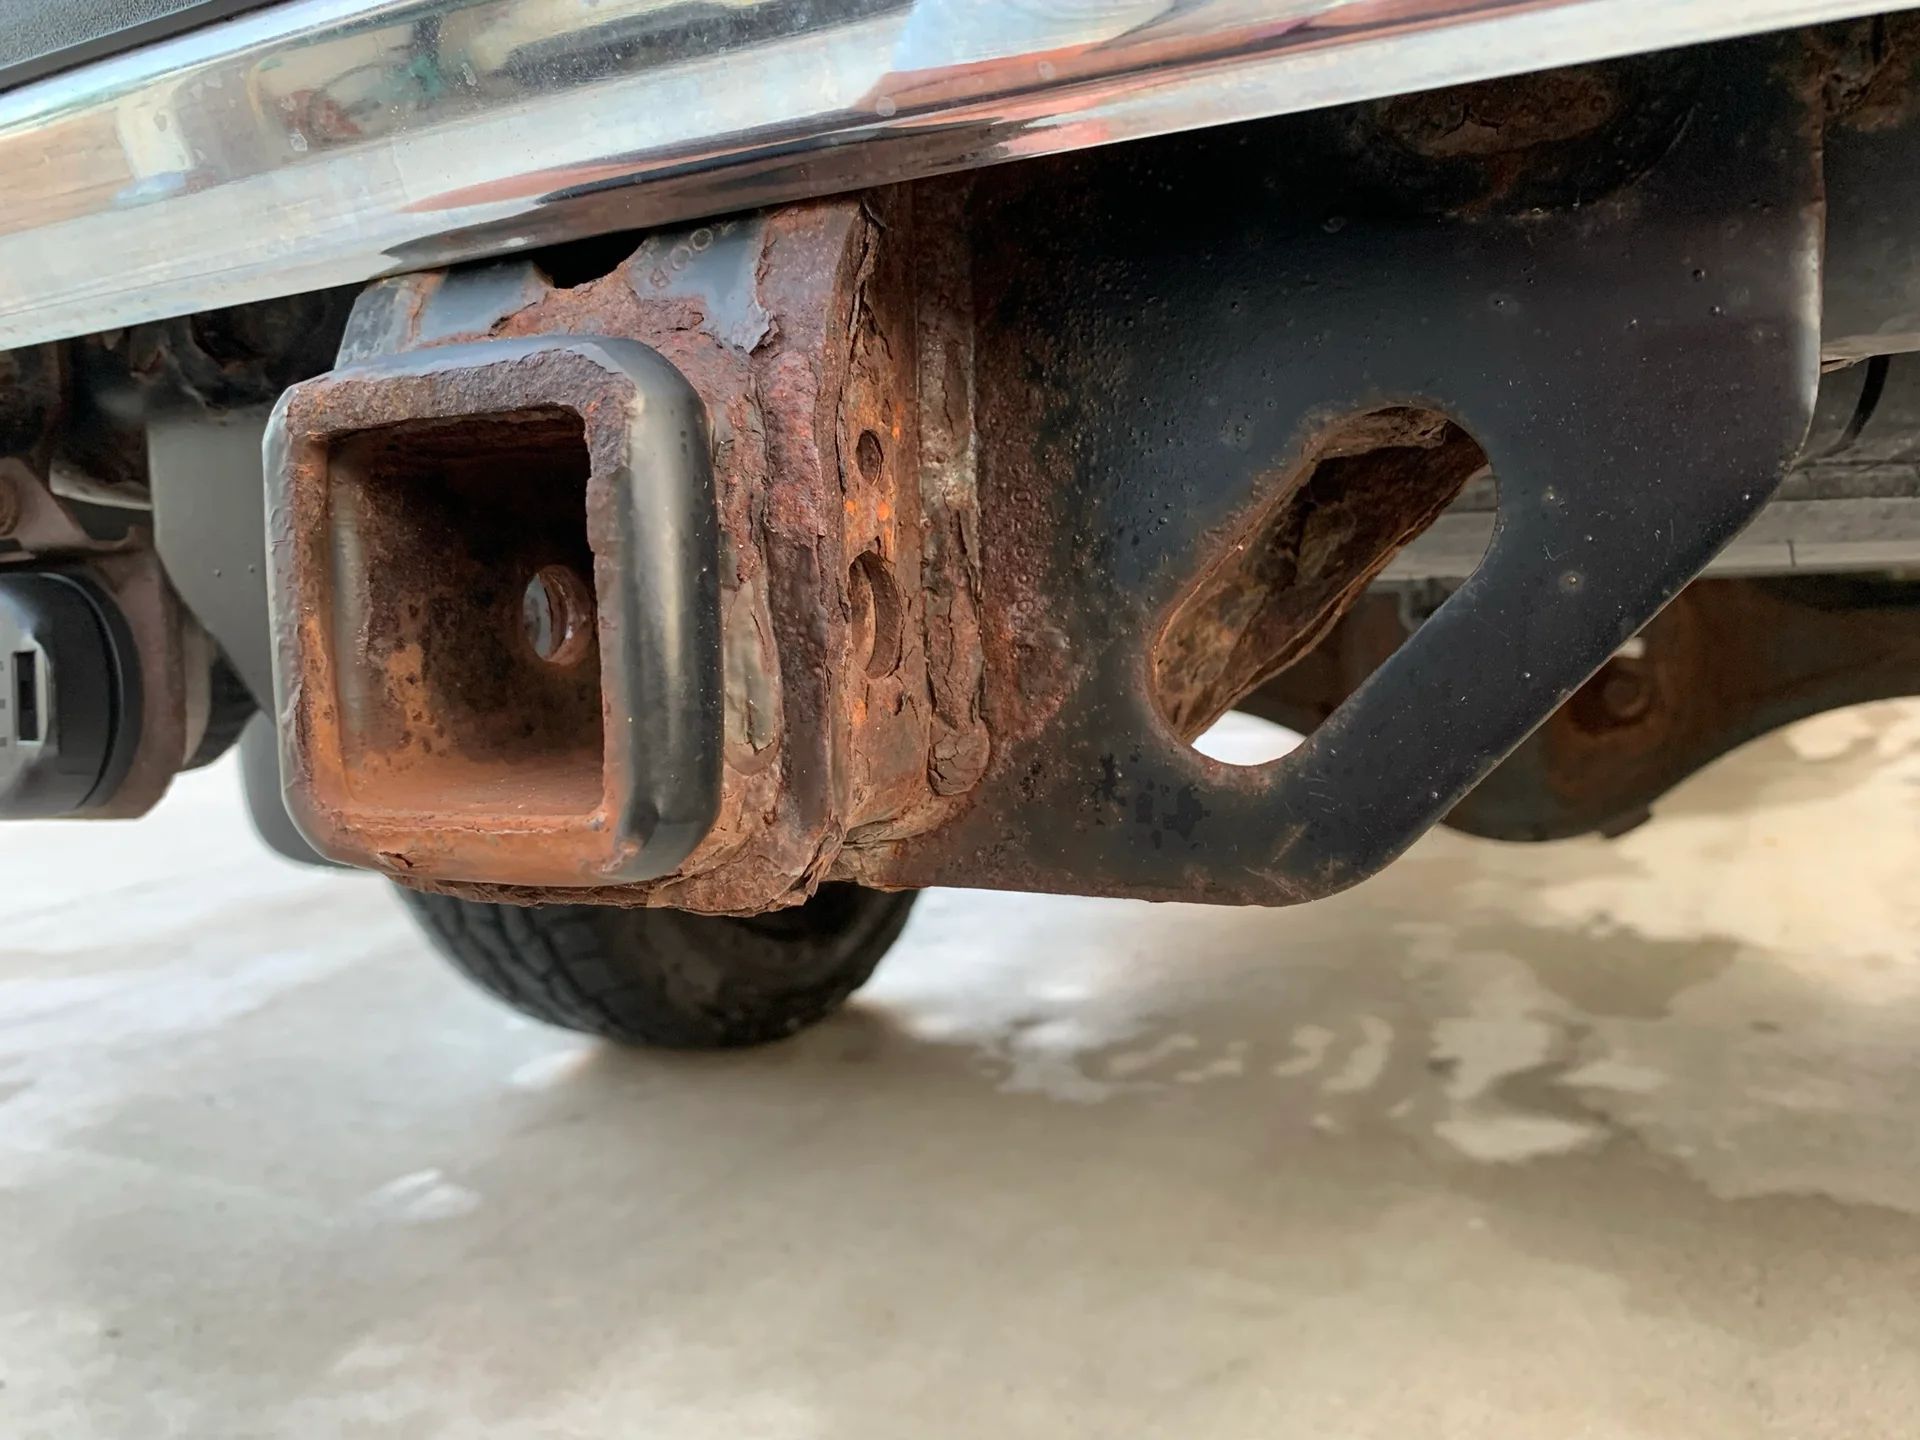
As an experienced installer, I always teach my customers to look for signs of wear on their trailer hitches. I emphasize checking for any visible cracks, bends, or deformations in the hitch structure, especially around welded joints and mounting points. These issues can compromise the hitch's integrity and lead to dangerous failures during towing.
I also stress the importance of inspecting the hitch ball and receiver for excessive wear or scoring. A worn ball can cause the trailer to detach unexpectedly, while a damaged receiver might not secure the ball mount properly. I advise replacing these components if they show significant wear to ensure safe towing operations.
Rust and corrosion are other critical signs I teach customers to recognize. While surface rust is common, deep corrosion can weaken the hitch's structure. I recommend thoroughly cleaning and inspecting the hitch regularly, paying special attention to areas where water might collect. If severe rust is found, I always suggest professional evaluation or replacement to maintain safety standards.
Troubleshooting Common Issues
As an installer, I'll guide you through common issues that may arise after a trailer hitch installation. We'll cover misaligned hitch problems, electrical connection troubleshooting, when to seek professional help, and warranty information. These insights will help you maintain a safe and reliable towing setup, ensuring your hitch performs optimally for all your towing needs.
Misaligned Hitch Installation
As an installer, I often encounter misaligned hitch installations. Common signs include uneven gaps between the hitch and vehicle frame, difficulty inserting the ball mount, or the hitch sitting at an angle. These issues can lead to unsafe towing conditions and must be addressed immediately.
To correct a misaligned hitch, I first loosen all mounting bolts and re-center the hitch. I use a level to ensure it's perfectly horizontal and adjust its position relative to the vehicle's centerline. This process may require temporarily removing the hitch and enlarging mounting holes for proper alignment.
After repositioning, I carefully retighten all bolts to the manufacturer's specified torque values. I then perform a visual inspection and test fit the ball mount to verify proper alignment. If issues persist, I may need to use shims or spacers to achieve the correct position. Here's a quick reference guide for addressing misalignment issues:
| Misalignment Issue | Correction Method | Tools Needed |
|---|---|---|
| Uneven Gaps | Loosen bolts, re-center hitch | Socket set, Torque wrench |
| Angled Hitch | Use level, adjust mounting | Level, Drill (if needed) |
| Off-Center Position | Realign with vehicle centerline | Measuring tape, Chalk line |
Electrical Connection Problems
When troubleshooting electrical connection problems, I first check for loose or corroded wiring at the vehicle-side connector. I carefully inspect each pin for signs of damage or oxidation, cleaning them with electrical contact cleaner if necessary. This simple step often resolves issues with intermittent lighting or non-functional turn signals.
If the vehicle-side connections appear sound, I move on to testing the trailer wiring harness. Using a multimeter, I verify proper voltage at each wire, ensuring the correct signals are reaching the trailer connector. I pay special attention to the ground wire, as a poor ground connection can cause multiple electrical issues.
For more complex problems, I use a trailer light tester to simulate trailer connections. This helps me identify if the issue lies with the vehicle's wiring or the trailer itself. If I find faults in the vehicle's wiring, I carefully trace the circuits back to their source, checking for any damaged wires or blown fuses along the way. In cases of extensive damage, I may need to replace sections of the wiring harness to restore proper functionality.
When to Consult a Professional
As an experienced installer, I recommend consulting a professional when you encounter persistent electrical issues or structural problems with your trailer hitch. If you've tried basic troubleshooting and still experience intermittent lighting or difficulty connecting the trailer, it's time to seek expert help. Professional technicians have specialized tools and diagnostic equipment to identify complex wiring problems quickly and efficiently.
I always advise customers to consult a professional if they notice any unusual noises, vibrations, or handling issues while towing. These symptoms could indicate a more serious problem with the hitch installation or vehicle suspension that requires expert attention. A professional can perform a comprehensive inspection and make necessary adjustments to ensure safe towing operations.
In my experience, it's crucial to seek professional assistance if you're unsure about your vehicle's towing capacity or need to modify your vehicle for a custom hitch installation. Professional installers can provide valuable insights on weight distribution systems, brake controllers, and other advanced towing equipment. They can also ensure that any modifications comply with local regulations and manufacturer specifications, protecting your warranty and ensuring your safety on the road.
Warranty and Support Information
As an installer, I always emphasize the importance of understanding warranty and support information for trailer hitches. Most quality hitches come with a limited warranty, typically covering manufacturing defects for a specific period. I advise customers to register their hitch with the manufacturer promptly to ensure full warranty coverage.
When troubleshooting issues, I recommend contacting the manufacturer's support team for guidance. They often provide valuable insights and can authorize warranty repairs if needed. I've found that keeping detailed records of the installation, including photos and receipts, can streamline the warranty claim process if issues arise.
In my experience, some manufacturers offer extended warranty options or additional support services. I always suggest reviewing these offerings carefully, as they can provide peace of mind for frequent towers. Additionally, I remind customers that proper maintenance and adherence to weight limits are crucial for maintaining warranty coverage and ensuring long-term reliability of their trailer hitch.
Frequently Asked Questions
What factors should I consider when choosing a towing trailer hitch?
When choosing a towing trailer hitch, consider your vehicle's towing capacity, the weight of your trailer, the hitch class needed, and compatibility with your vehicle's make and model. Other factors include the type of trailer, frequency of use, and any additional features you may require for your specific towing needs.
How do I determine the correct weight capacity for my trailer hitch?
To determine the correct weight capacity for your trailer hitch, check your vehicle's owner's manual for its towing capacity. Then, choose a hitch rated for that weight or higher. Consider both the gross trailer weight and tongue weight when selecting your hitch to ensure safe towing.
What tools are necessary for installing a towing trailer hitch?
To install a towing trailer hitch, you'll need a socket set, torque wrench, safety glasses, and jack stands. Depending on the vehicle, you may also require a drill, wire brush, and rust penetrant. Always consult your vehicle's manual for specific requirements and safety precautions.
How long does it typically take to install a trailer hitch?
The typical installation time for a trailer hitch varies depending on the vehicle and hitch type, but generally takes between 30 minutes to 2 hours. Factors like hitch complexity, vehicle accessibility, and installer experience can affect the duration. Professional installers often complete the job more quickly.
What safety checks should I perform after installing a towing trailer hitch?
After installing a trailer hitch, perform these essential safety checks: verify secure attachment, test electrical connections, check safety chains, inspect mounting hardware, and ensure proper weight distribution. Always consult your vehicle's manual and consider a professional inspection for peace of mind.
Conclusion
Installing a towing trailer hitch correctly is crucial for safe and efficient towing, requiring careful consideration of vehicle compatibility, hitch class selection, and proper installation techniques. This comprehensive guide empowers vehicle owners with the knowledge to choose the right hitch, prepare for installation, and perform essential safety checks, ensuring a secure connection between vehicle and trailer. Proper maintenance and regular inspections are vital for the longevity and reliability of the hitch system, safeguarding against potential hazards on the road. By following these guidelines and recognizing when to seek professional assistance, towing enthusiasts can enjoy peace of mind and optimal performance from their trailer hitch setups.
WE WON'T LEAVE YOU HANGING ON INSTALLATION.
Explore an extensive range of essential products for cars, SUVs, and trucks, featuring items that cater to both style and functionality,
including versatile cargo carriers suitable for roof and trailer hitch setups.
OUR CUSTOMERS LOVE US

We needed to swap our hitch mount and ball but were unsure exactly what we needed. The two men working were extremely helpful in pointing out what we needed and even helped us swap the hitch despite them being about to close. Great service!!
Allison Safko
Very quick and friendly service. Hitch installed on a Ford Escape for an upcoming move – took less time than anticipated and job well done. Highly recommend.
Matt Madsen
This place is great. Knowledgeable and super fair on prices. Got a break controller here and it worked out of the box. People here know their stuff. Way better than going to Uhaul.
James Olsen

CONTACT US
Hitch Corner (Littleton)
Phone:
(303) 904-1558
Email:
info@hitchcorner.com
Address:
10677 W. Centennial Rd. Suite 103 Littleton, CO 80127
BUSINESS HOURS
- Mon - Fri
- -
- Saturday
- -
- Sunday
- Closed